How Can We Help?
Staging a website with Softaculous
It’s rarely (never) a good idea to make significant updates to a live site – minor content tweaks maybe – but updates to plugins, themes or core files should all be tested on a staging version of your site – to ensure nothing breaks – before being pushed to live.
Softaculous Apps Installer includes the ability to create a staging copy of your site – and then track file & database changes – so these can be pushed back to the live site once you’re sure everything is working as you expect.
Prior to starting this you must have setup the sub-domain “staging” to receive the staged site. You may also want to apply a SSL certificate to the staging domain to maintain HTTPS. This staging process is similar for all other Softaculous managed applications.
You can only stage sites that are already managed within you local Softaculous Apps Installer.
Always make sure you have a good backup of your site before making any changes – so you can roll-back if anything goes wrong.
Pre-requisite – Check current installation details
Before you make a staging or clone site it’s important to check all required files will be included e.g. additional files required by a security or other plugin.
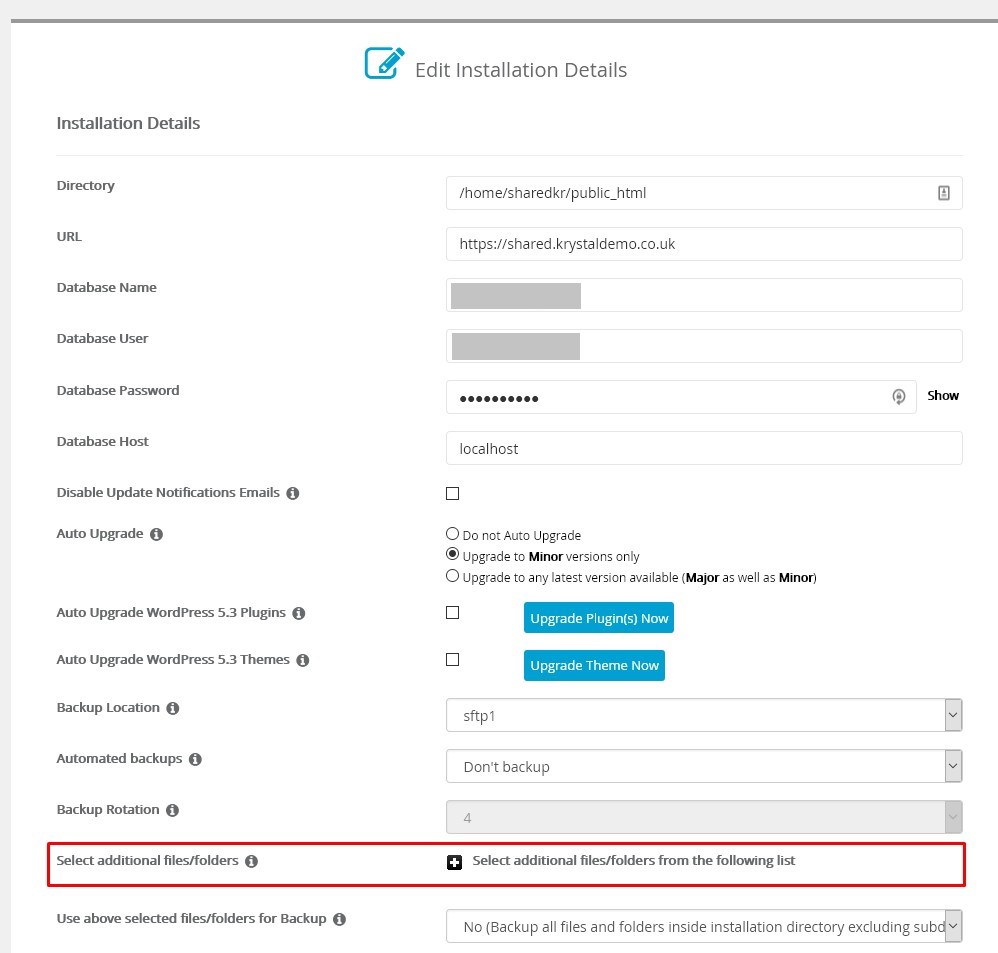
Click the Pencil (Edit Details icon) next to the site in the Softaculous Current Installations list.

Click the + icon to drop-down the Select additional files/folders file list.

Click the checkbox to tick any additional files/folders you want included in your stage or clone site. Here we’ve ticked the .user.ini and wordfence-waf.php files as these are required for the WordFence plugin.

Should you clone or stage a site and find that when you visit it you get an error or a white screen it’s likely the cause could be missing files.
Click the Save Installation Details button to finish.
Creating the Staging site
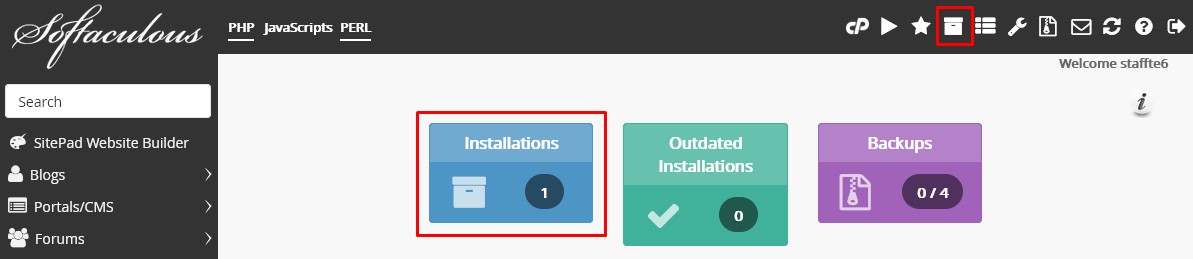
Open the Softaculous Apps Installer from the Software section of cPanel

Click either the All Installations icon or the Installations button.

From your installed applications list, click the Staging icon next to the site you’d like to work with.

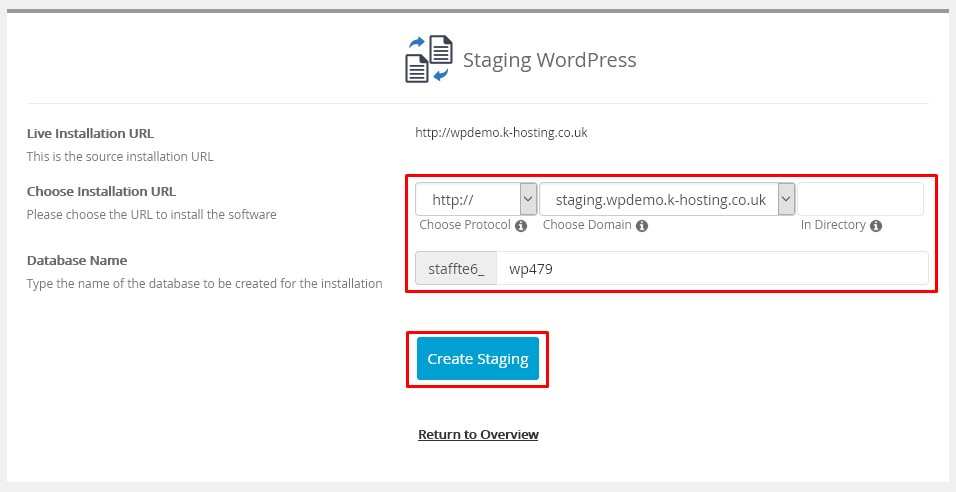
On the Staging screen choose the appropriate details from the drop-down options:

Choose Installation URL – Protocol, Domain and optional directory
Database Name – can be changed here if necessary
Click the Create Staging button to complete the process.
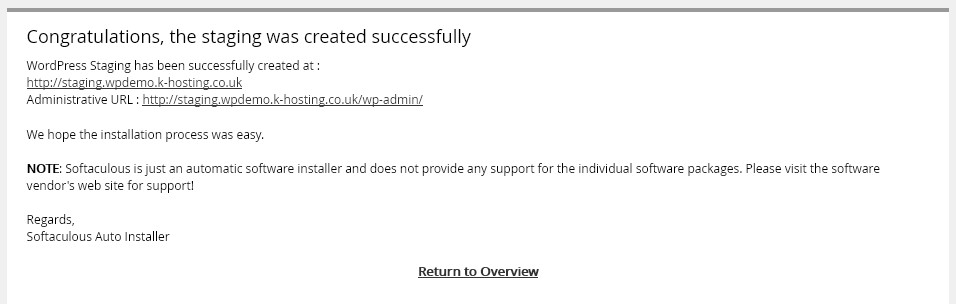
You’ll see a success notice once the staging has completed.

Click Return to Overview to get back to the WordPress installations dashboard.
You’ll see the newly staged site under Current Installations.

– The URL under the Link column will take you to the site homepage (if you’ve updated your DNS).
– The person icon under the Admin column is a one-click link to the WordPress admin dashboard – you will be automatically logged in.
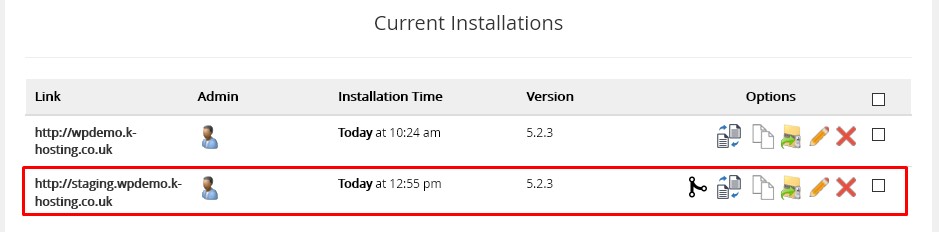
Pushing changes from Staging back to the original site
Once you’re finished making your changes on the Staging site you’ll be ready to push them back to live.
You may need to apply some caution here. If you are running an e-commerce site, or collect data from clients that gets stored in your sites database – you need to ensure you don’t overwrite any data collected between when you created the staging site and when you push back the changes.
If you are concerned about this it would be better to put your live site in to maintenance mode, create the staging site, make any changes and then push them back – then, once complete, remove the site from maintenance mode.
If you are confident you know what you are doing the staging process does let you select specific database tables.
Open the Softaculous Apps Installer from the Software section of cPanel

Click either the All Installations icon or the Installations button.
From your installed applications list, click the Push to Live icon next to the site you’d like to work with.

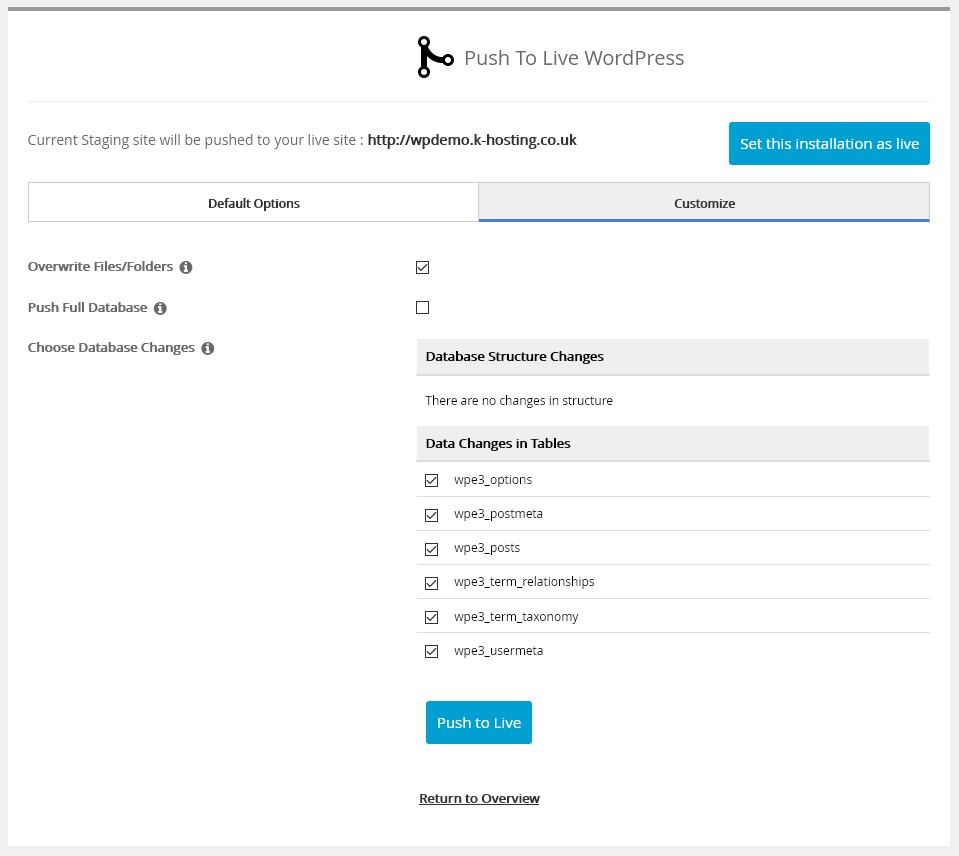
You’ll have two options here, either
Default Options – This will replace all the files of your live installation with the ones in Staging installation and will erase the live database and import the database from your staging installation.
or
Customize – where you can choose which database tables to push

In this example, I have added a plug-in and created a new post.
So, I do want to push the files (so the plugin files get transferred) and I’m happy with those database tables for the post.
Click Push to Live to complete the process.
For WordPress:
Plugins will retain their active/deactivated state during Staging/Push to Live
Plugins deleted on staging will be deactivated on live – but their files will not be removed – you will need to Delete them on live manually.